Running the Windows Small Business Server 2011 for a long time, many people have to face to the problem that the system partition or a data volume becomes full. System updates, services and third-party applications eat up the free space easily. When there is not enough free space, even lack of space warning popping up, what will you do?
Many people may back up the system and all data, recreate the disk partitions and then restore everything. Yes, you can achieve if you do like this, but it costs such a long time and your happy weekend will be wasted. New technology makes everything possible, nowadays, you can resize the SBS 2011 partitions directly. It is fast and easily. However, to a server, backing up is always a good habit.
Resize SBS 2011 disk partitions without starting over
Firstly, open the Disk Management console to find out the disk partition layout, from there you’ll know all important information of the disk and partitions. If there is unused space in a partition, you can extend another one in the same hard disk.
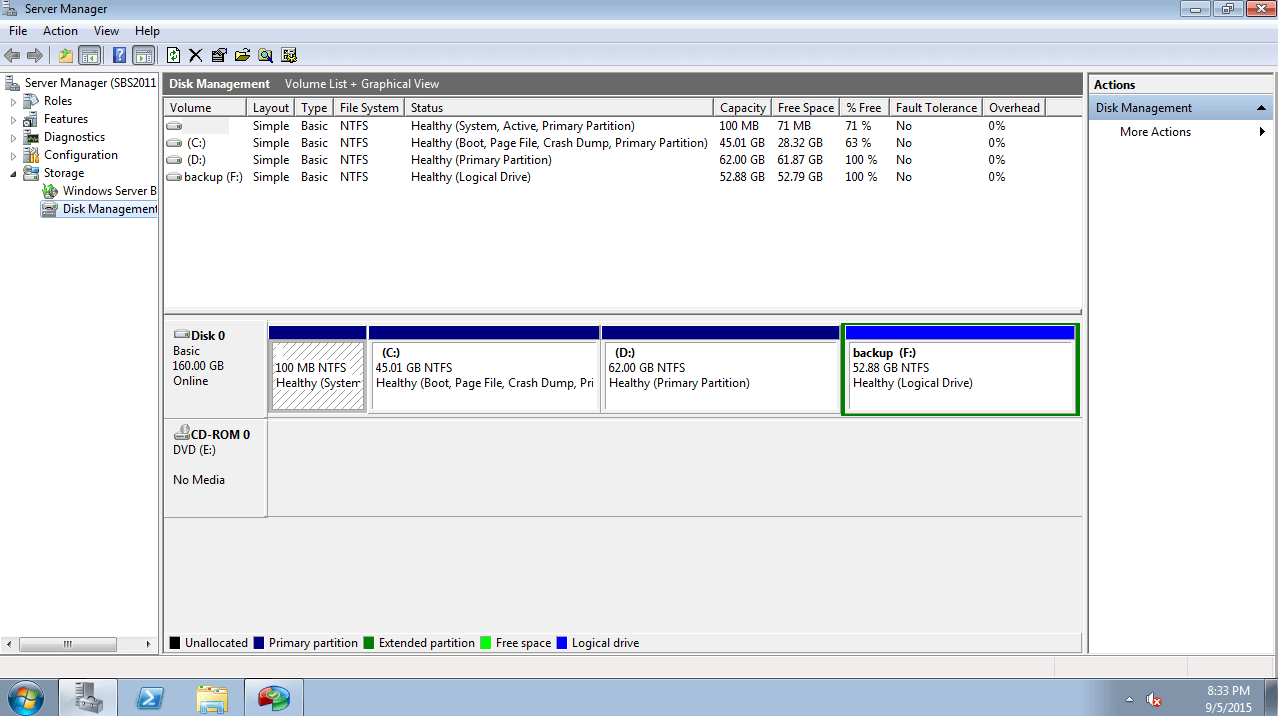
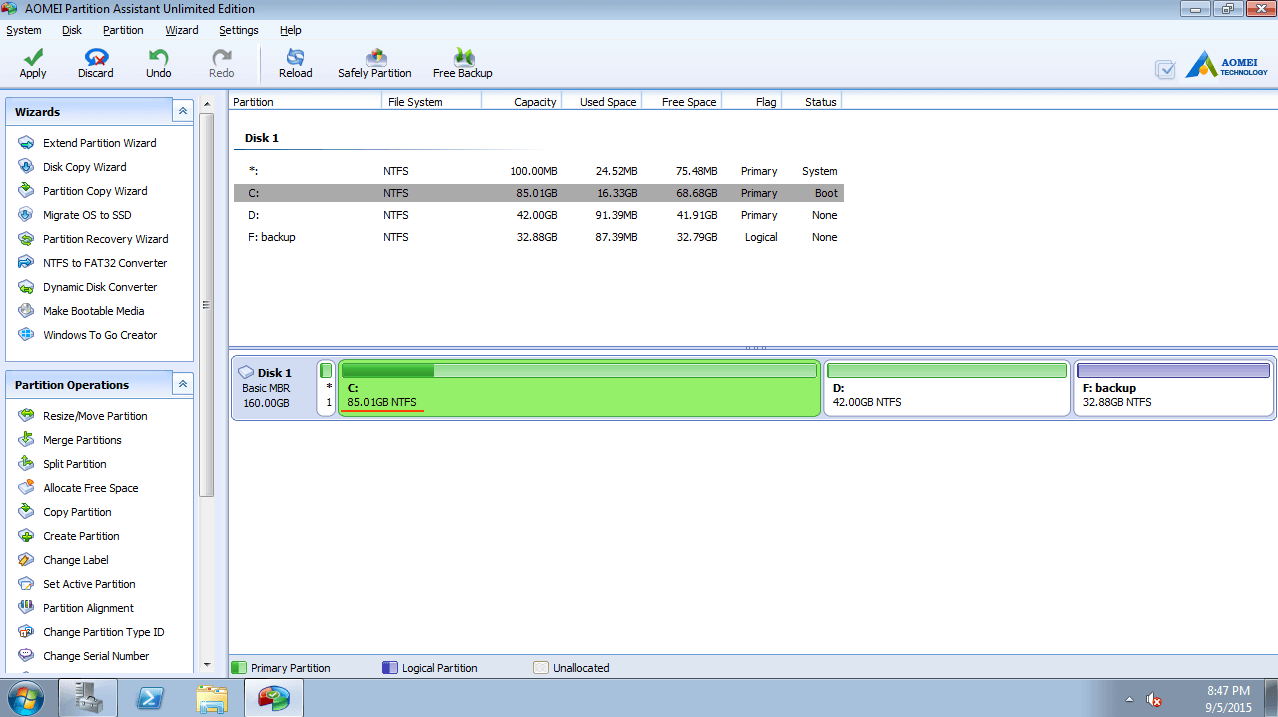
From the screenshot, there are four partitions in Disk 0, if you want to extend the system C: drive, just check if there is free space in drive D: and F:
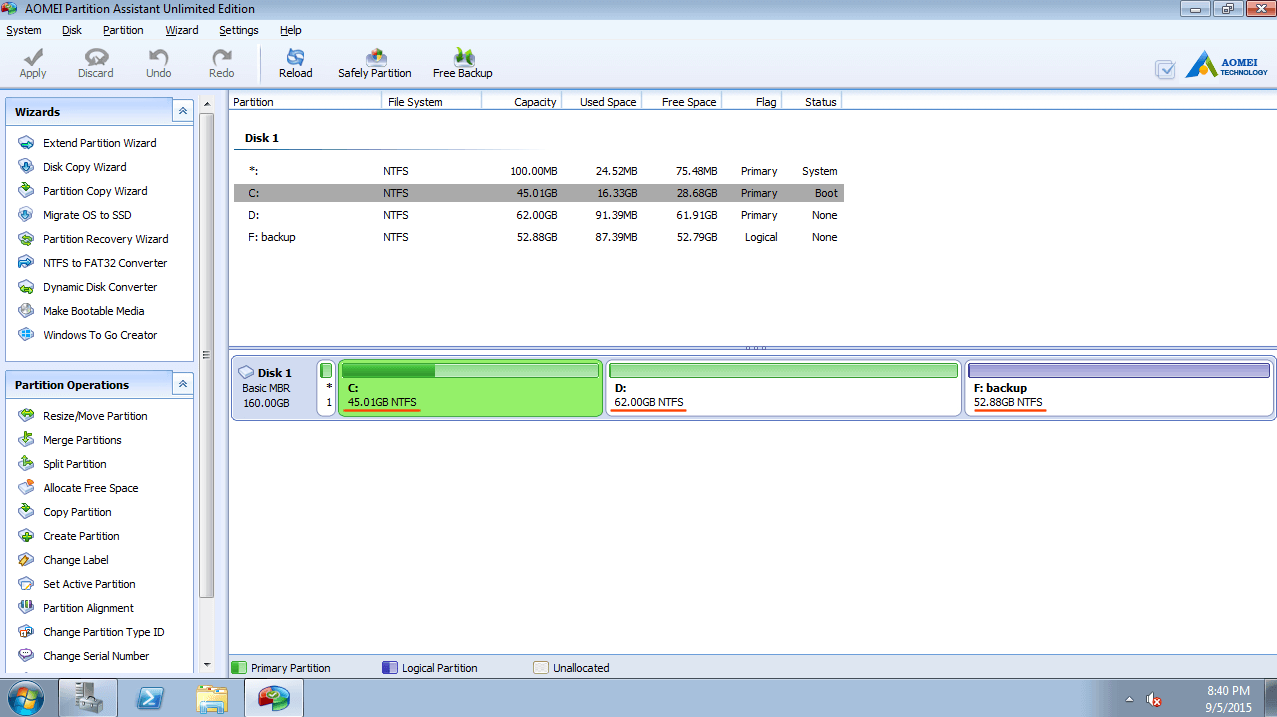
Launch AOMEI Partition Assistant Server Edition, you’ll see the disk partitions that connect to your server, the GUI is similar with SBS 2011 Disk Management.
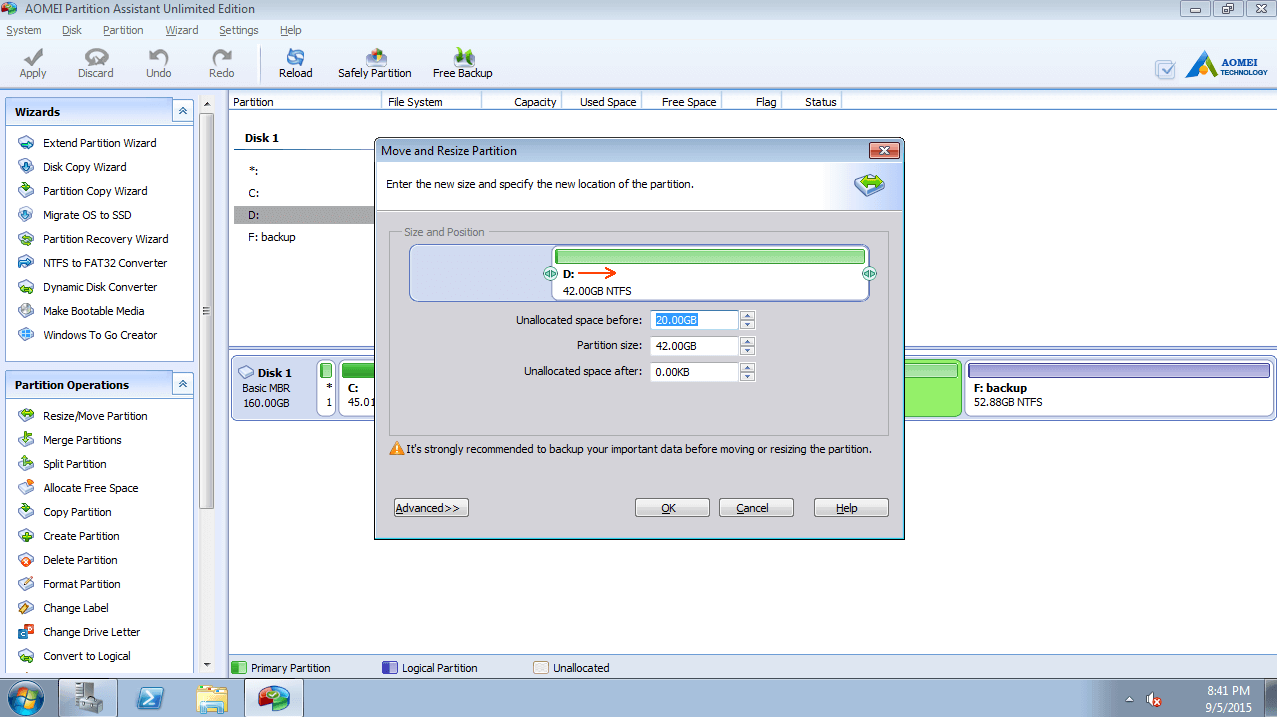
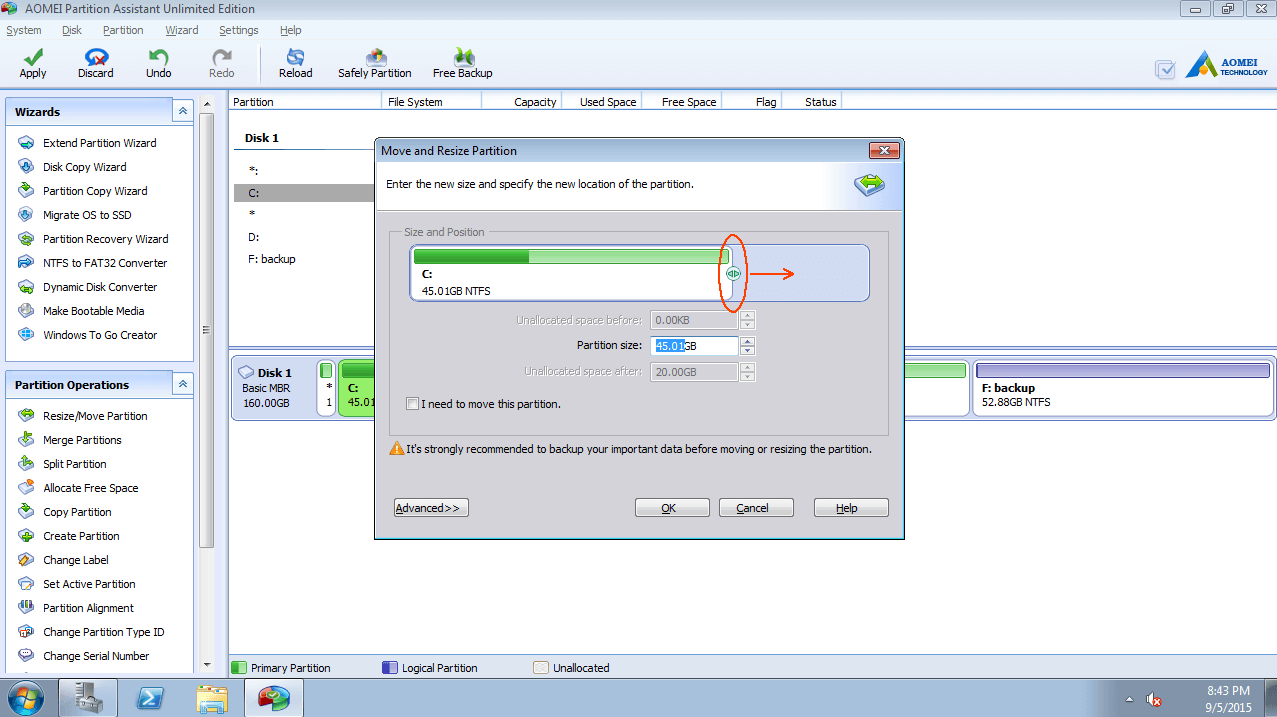
Right click drive D and select “Resize Partition”. In the pop-up window, drag the [highlight2]left border[/highlight2] rightwards to shrink it.
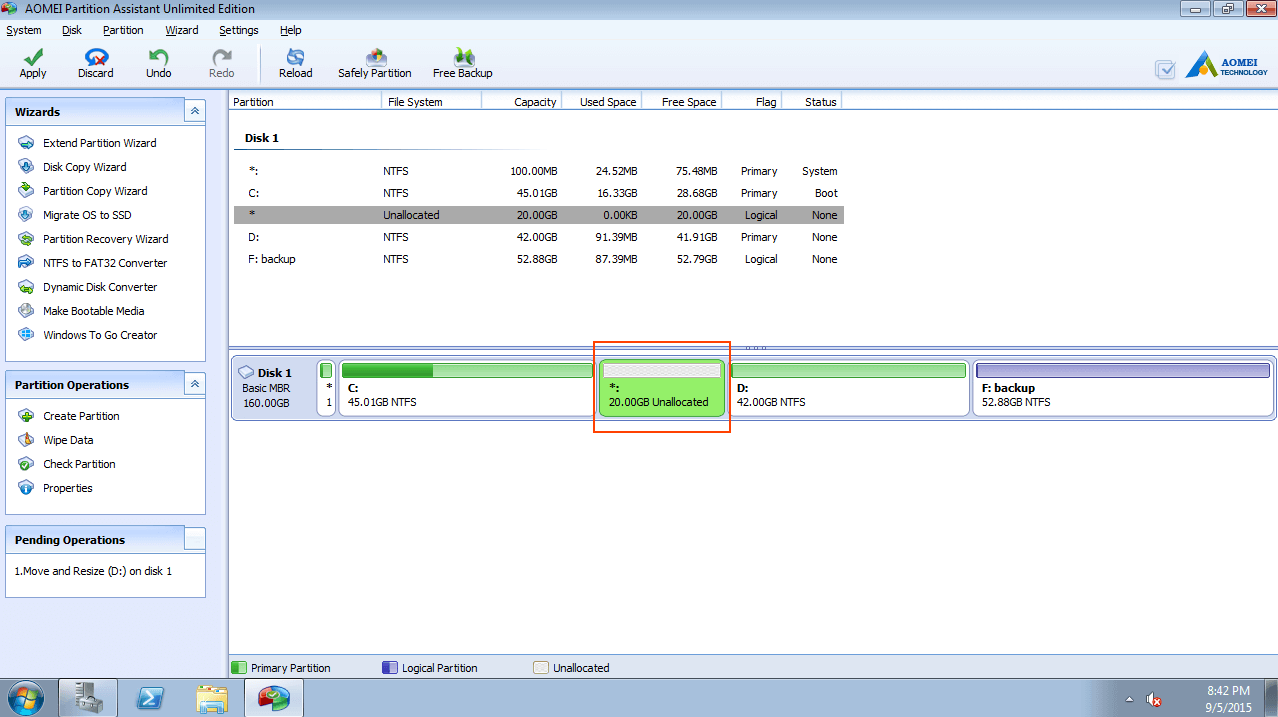
Click “OK” and back to the main window, 20GB Unallocated space was created behind C.
Right-click drive C and select “Resize Partition” again, in the pop-up window, drag the [highlight2]right border[/highlight2] rightwards to hold the free Unallocated space.
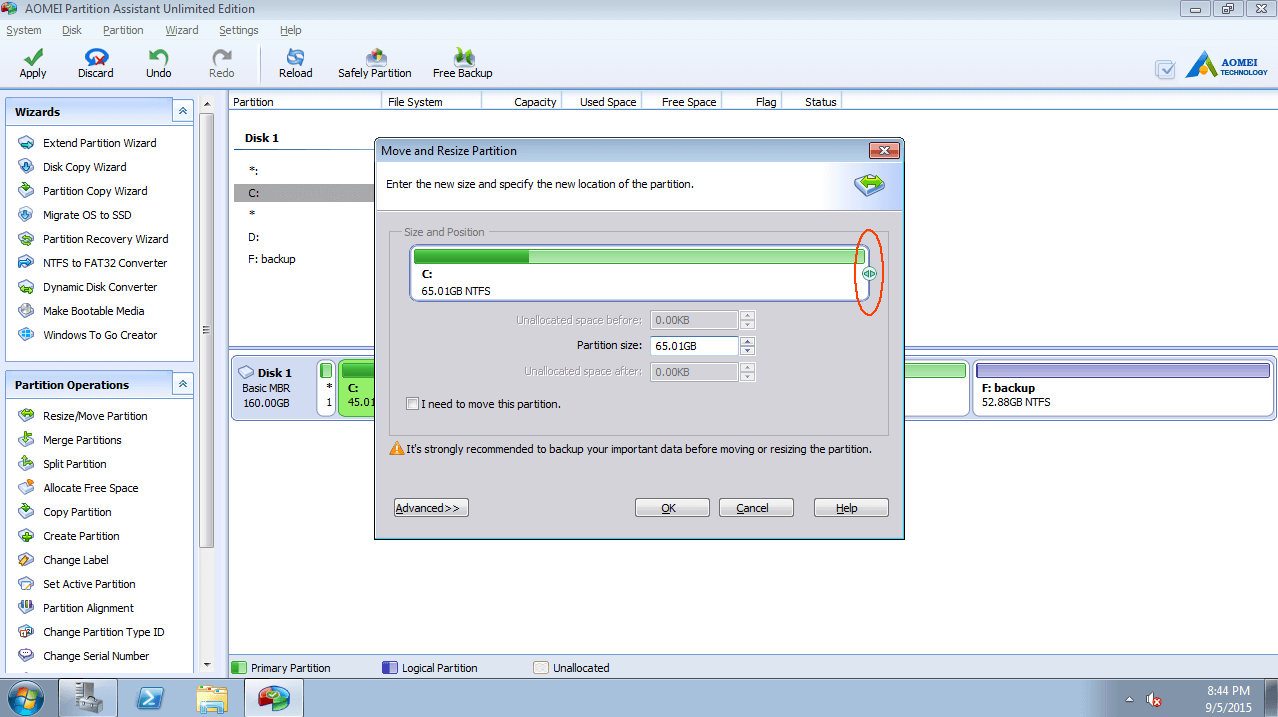
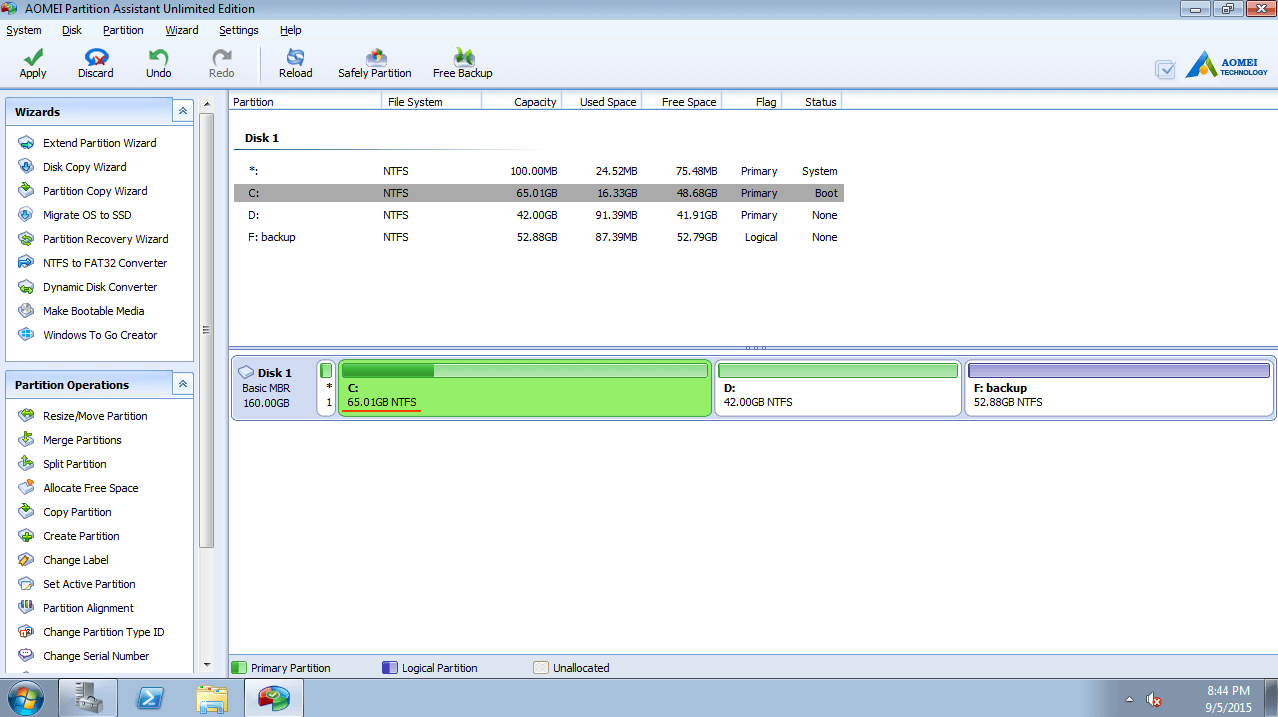
Click “OK” and back to the main window, as you see, the system C drive was extended.
Resize non-adjacent partitions
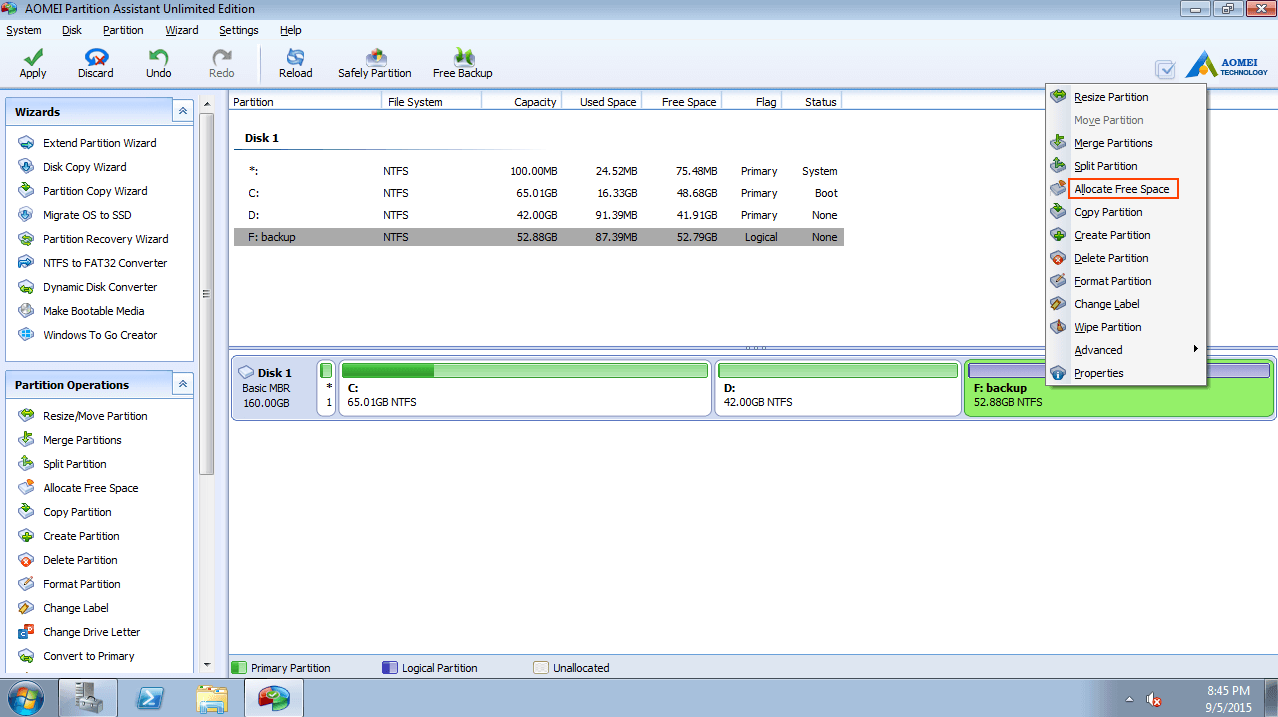
If there is not enough free space in the adjacent partition (D:), you can still resize the non-adjacent partition (F:) to extend C. To do this, other partition resizing tools have to resize F, move D and extend C, so complicated. To make the task much easier, AOMEI Partition Assistant provide an unique feature “Allocate Free Space”, let’s see how easy it is to resize the disk partitions.
Launch Partition Assistant, right click drive F and select “Allocate Free Space”.
In the pop-up window, type the value of how much free space to take from F, and then select C as the target drive to get the free space.
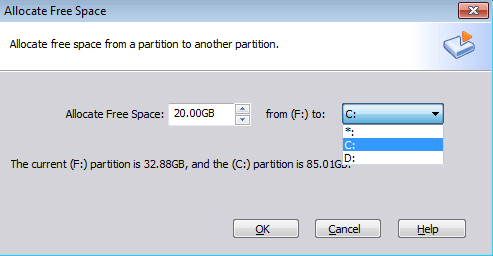
Click “OK” and back to main window, both drives has been resized.
To resize the partitions, you just need to select and click. To avoid mistake, the partition resizing works in virtual mode, if you do no want to resize drives like this, just click “Discard” or “Undo” on top left corner, and then redo. If it is okay, click “Apply” button to proceed, the physical disk partitions will be resized.
Actually, AOMEI Partition Assistant is not only a tool to change partition size, but also a toolkit to help you better manage disk partitions, why not download the demo version to try.
Leave a Reply
You must be logged in to post a comment.